
Here is a dump of all of my notes from the CalTech Devops PGC certificate, they aren’t in any particular order. I will only be posting from the courses I found more relevant:
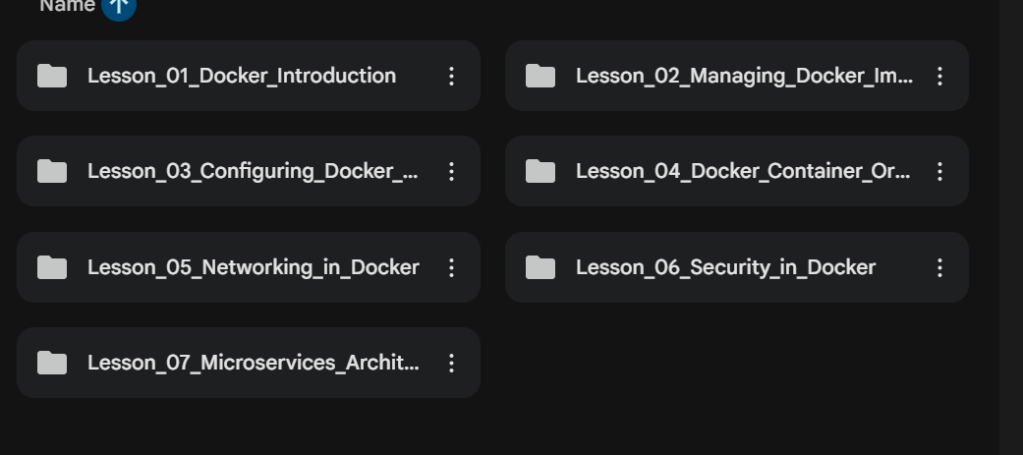
There were 6 lessons in this course:
Lesson 01: Docker Intro
Configuring Docker Daemon to Start on Boot
This lesson walks through the process of installing and configuring Docker on a Linux system while ensuring that the Docker daemon automatically starts whenever the server boots. The guide begins by preparing the operating system through package updates and installing the dependencies required to access secure HTTPS repositories. It then demonstrates how to add Docker’s official GPG key and repository, ensuring that Docker packages are downloaded from a trusted source. Once the repository is configured, Docker Community Edition (Docker CE) is installed and the Docker service is started.
A major focus of the lesson is service management and customization. After installation, the Docker daemon is enabled using systemd so that container services remain available after reboots. The lesson also covers how to disable automatic startup when needed, reload daemon configurations, and use Upstart overrides to control service behavior. Finally, it introduces Docker daemon customization through the daemon.json file, where administrators can define a custom data storage location and specify the storage driver. These configurations help manage disk utilization, improve operational flexibility, and provide a foundation for maintaining Docker environments in production systems.
Lesson 02:Docker Images and registries
Demonstrating Lifecycle of Containers
This lesson introduces the complete lifecycle of a Docker container, from downloading an image to running, inspecting, stopping, and managing the container. Using the Nginx web server image from Docker Hub, the exercise demonstrates how a container is created and launched with port mappings that expose the application to users. Students learn how to verify container operation using commands such as docker ps and by accessing the Nginx welcome page through a web browser.
The lesson also emphasizes container management and visibility. By using commands like docker inspect, users can view detailed configuration information, networking settings, and runtime parameters associated with a container. Understanding these lifecycle stages helps build foundational Docker skills, enabling administrators and developers to efficiently deploy, monitor, troubleshoot, and manage containerized applications in production environments.
Creating a Docker Image
This lesson demonstrates how to create a custom Docker image using a Dockerfile. Starting with a base Ubuntu image, the Dockerfile installs the Nginx web server, copies a custom HTML file into the web server directory, and configures Nginx to run in the foreground. This approach showcases Docker’s Infrastructure-as-Code philosophy, where application environments can be defined and recreated consistently through simple text-based configuration files.
A key focus of the exercise is customization. By creating a custom welcome page and embedding it within the image, users learn how Docker images can package both software and application-specific content. After building the image, the lesson demonstrates how to verify its creation using Docker image management commands. This workflow provides a practical introduction to building reusable application images that can be deployed repeatedly across development, testing, and production environments.
Tagging an Image
This lesson focuses on Docker image tagging, a critical practice for organizing, versioning, and distributing container images. Beginning with the Nginx image downloaded from Docker Hub, the exercise demonstrates how images can be tagged using an image ID, image name, or a combination of image name and version tag. Through these methods, users create multiple versions of the same image, enabling easier identification and lifecycle management.
The lesson also introduces tagging images for private repositories and registries. By assigning repository names and version numbers, organizations can establish structured image management processes that support application releases, updates, and rollbacks. Proper tagging practices become especially important in CI/CD pipelines and enterprise container environments where multiple image versions may coexist simultaneously.
Displaying Layers of a Docker Image
Docker images are built using a layered architecture, and this lesson explores how those layers are created and viewed. Students build a custom Docker image containing multiple instructions, including package installation, directory creation, file copying, and environment variable configuration. Each Dockerfile instruction generates a new image layer, contributing to Docker’s efficient storage and caching mechanisms.
After building the image, the lesson demonstrates how to examine its history using Docker’s image inspection tools. Viewing image layers provides valuable insight into how Docker constructs images and helps developers identify optimization opportunities. Understanding image layers is essential for creating smaller, more efficient images, reducing build times, and improving overall container deployment performance.
Deploying and Configuring a Registry
This lesson introduces Docker registries by demonstrating how to deploy and configure a local registry server. Registries provide centralized storage for container images, allowing teams to share, distribute, and manage application images within their organizations. The exercise walks through launching a registry container, verifying its operation, and preparing it to receive images.
Once the registry is running, users pull an Ubuntu image, tag it for the local registry, push it into the registry, and later retrieve it again. These steps simulate the complete image distribution workflow commonly used in enterprise environments. By understanding local registries, learners gain insight into how organizations maintain secure, internal repositories that support application deployment, version control, and software supply chain management.
Pushing an Image to Registry
This lesson expands on registry concepts by demonstrating how to transfer an image from Docker Hub into a private registry. The workflow begins with pulling an Nginx image, assigning a new tag that references the local registry, and then pushing the image to that registry. This process mirrors real-world scenarios where organizations maintain internal copies of public images for security, compliance, or availability purposes.
The lesson also covers image validation and cleanup procedures. After pushing the image, users remove local copies and then pull the image back from the registry to verify successful storage and retrieval. These activities reinforce the role of registries as centralized repositories that simplify image sharing while supporting consistent deployment practices across multiple systems and environments.
Pulling and Deleting Images from Registry
This lesson demonstrates the complete workflow of retrieving, distributing, and removing Docker images. Students begin by pulling an Ubuntu image from Docker Hub and examining its digest identifier, which provides a unique and immutable reference to a specific image version. Pulling images by digest ensures consistency and guarantees that the exact same image is retrieved across environments.
The lesson then walks through tagging the image for a local registry, pushing it to the registry, retrieving it again, and ultimately deleting Docker images from the system. By combining image distribution with cleanup operations, learners gain practical experience managing storage resources while maintaining efficient image repositories. These skills are important for controlling disk usage and ensuring that container environments remain organized and maintainable.
Inspecting, Removing, and Pruning Images
This lesson focuses on Docker image maintenance and housekeeping. After downloading an Nginx image, users learn how to inspect image metadata using the docker image inspect command. Inspection provides detailed information about image configuration, layers, repository tags, and other attributes that help administrators troubleshoot and validate container images.
The lesson concludes by demonstrating image removal and pruning techniques. Individual images can be deleted when no longer needed, while pruning commands automatically remove unused and untagged images to reclaim disk space. These maintenance practices are essential in environments where numerous images are built and deployed regularly, helping ensure efficient resource utilization and preventing unnecessary storage consumption.
Lesson 03: Storage and Volumes
Demonstrating How to Use Storage Across Cluster Nodes
This lesson introduces Docker storage in clustered environments by demonstrating how a volume created on a manager node can be utilized by services running across multiple nodes. The exercise begins by creating a Docker volume and then deploying a replicated service with multiple Nginx containers. By attaching the volume to the service, learners gain insight into how persistent storage can be shared and leveraged across a Docker Swarm environment.
A major takeaway from this lesson is understanding data persistence in distributed container deployments. By inspecting worker nodes and verifying that the volume is accessible across the cluster, students see how Docker manages storage resources for replicated workloads. This capability is essential for stateful applications that require consistent access to data regardless of which node is hosting a particular container instance.
Creating a Docker Volume and Mounting It to a Container
This lesson focuses on one of Docker’s most important storage features: volumes. Docker volumes provide persistent storage that exists independently of a container’s lifecycle, ensuring that application data remains available even when containers are stopped, recreated, or removed. The exercise demonstrates how to create a volume, view existing volumes, and inspect its configuration details.
The lesson then walks through mounting the volume into a running Nginx container using the -v flag. By inspecting the container and reviewing its mount configuration, learners verify that the volume is correctly attached. This process illustrates how Docker volumes simplify data management, improve portability, and provide a reliable method for storing application data outside of ephemeral container filesystems.
Developing a Backup and Restore Plan for Docker Volumes
This lesson demonstrates how to protect containerized application data through backup and recovery procedures. Using Docker volumes, the exercise creates a container that stores persistent data and then generates a backup archive using the tar utility. By mounting the volume and exporting its contents to a backup file, students learn how to safeguard critical application information against accidental deletion, corruption, or infrastructure failures.
The restoration process is equally important and forms the second half of the lesson. A new container is created with its own volume, and the backup archive is extracted into the new environment. This workflow demonstrates how Docker volumes can be recovered and migrated between containers, providing a practical disaster recovery strategy. Organizations that rely on containerized applications can use similar techniques to ensure business continuity and data resilience.
Selecting a Storage Driver
Docker storage drivers determine how container layers and filesystem changes are managed. This lesson explores two commonly used storage drivers—overlay2 and fuse-overlayfs—and demonstrates how to configure them through Docker’s daemon.json configuration file. Students learn how to modify Docker’s storage settings, specify data storage locations, configure DNS settings, and restart the Docker daemon to apply changes.
The lesson also highlights the importance of selecting the appropriate storage driver for a given environment. By verifying the active driver with Docker information commands and configuring alternative drivers on worker nodes, learners gain insight into how storage drivers affect performance, compatibility, and resource utilization. Understanding storage drivers is crucial for optimizing Docker deployments and ensuring efficient management of container storage across various infrastructure platforms.
Lesson 04: Container Orchestration
Setting up a Swarm Cluster with Managers and Worker Nodes
This lesson introduces the foundational concepts of Docker Swarm by guiding learners through the creation of a simple cluster consisting of a manager node and worker nodes. The exercise begins with initializing swarm mode on a manager node using docker swarm init, which creates the orchestration environment and generates the join token needed for additional nodes. Learners then join worker nodes to the cluster and verify cluster membership using node management commands.
A key takeaway from this lesson is understanding the roles of managers and workers within a swarm. Manager nodes are responsible for scheduling and orchestration, while worker nodes execute assigned tasks. By listing cluster nodes and verifying their status, students gain practical experience with the architecture that enables high availability, workload distribution, and container orchestration across multiple systems.
Running Replicated and Global Services
This lesson explores two primary service deployment models available in Docker Swarm: replicated services and global services. Learners first create a replicated Nginx service that maintains a specified number of container instances. They then deploy a global service using Alpine Linux, which automatically schedules one container instance on every node in the swarm cluster.
The lesson demonstrates how Docker provides flexibility in workload placement depending on application requirements. Replicated services are ideal when a fixed number of instances are needed for scalability and redundancy, while global services are commonly used for monitoring agents, logging tools, or infrastructure components that must run on every node. By examining service status and task assignments, students gain insight into how Swarm manages distributed applications.
Running a Container into Services Running Under Swarm
This lesson builds upon Swarm service concepts by deploying Nginx services in both global and replicated modes. The exercise demonstrates how a global service ensures that every node runs an Nginx container while a replicated service creates a specific number of container instances for load balancing and fault tolerance. Service creation commands include port publishing and replica management to expose applications across the cluster.
By reviewing service task status and container placement, learners observe how Swarm automatically distributes workloads across available nodes. This lesson reinforces core container orchestration concepts such as scalability, service availability, and automated scheduling, which are critical for deploying production-ready containerized applications.
Inspecting a Service on Swarm
This lesson focuses on monitoring and inspecting Docker services running within a swarm environment. Students deploy a replicated Redis service and then use service inspection commands to review task placement, replica status, and service configuration details. The exercise highlights both human-readable and JSON-formatted inspection outputs for troubleshooting and operational visibility.
The primary value of this lesson is understanding how to gather detailed information about running services. By examining task distribution and service metadata, administrators can validate deployments, troubleshoot issues, and verify cluster behavior. These inspection techniques are essential for maintaining reliable containerized environments and ensuring services are functioning as expected.
Converting an Application Deployment into Stack
This lesson demonstrates how to transform a standalone containerized application into a fully managed Docker Stack deployment. Using a Flask application connected to Redis, learners create application source files, dependency definitions, Docker images, and a docker-compose.yml file. The application is then packaged, pushed to a registry, and deployed as a stack within a Docker Swarm cluster.
The exercise highlights the advantages of stack deployments, including centralized configuration management, simplified scaling, and consistent application delivery. By leveraging Docker Compose definitions as deployment templates, organizations can manage complex multi-container applications more efficiently while benefiting from Swarm’s orchestration capabilities.
Mounting Volumes via Swarm Services
This lesson introduces persistent storage concepts within Docker by demonstrating both named volumes and bind mounts. Learners create Docker volumes, attach them to containers using different mount syntaxes, and observe how data persists independently of container lifecycles. The exercise also covers read-only mounts and the use of host directories as storage locations.
The second portion of the lesson explores temporary file systems (tmpfs) and data management inside containers. By creating files within mounted storage locations and verifying persistence, students gain practical experience with storage strategies used in real-world container deployments. Understanding volumes and mounts is essential for maintaining application state and managing data across distributed environments.
Using Templates with Docker Create Service
This lesson demonstrates Docker’s templating capabilities, which allow dynamic configuration of service attributes during deployment. Learners create a service whose container hostname is automatically generated using variables such as node hostname, node ID, and service name. This approach enables more flexible and automated service configuration across a swarm cluster.
By inspecting service tasks and reviewing generated hostnames, students see how templates can simplify administration and improve deployment consistency. Dynamic templates are particularly valuable in large-scale environments where manually configuring container attributes would be impractical. This lesson introduces a powerful automation feature that enhances service management and operational efficiency.
Troubleshooting an Undeployable Docker Service
This lesson focuses on diagnosing and resolving deployment failures within Docker Swarm. Learners begin by inspecting services, reviewing replica status, and identifying failed tasks. They then use detailed inspection commands, container state information, and log analysis tools to determine the root causes of deployment problems.
The lesson emphasizes a structured troubleshooting methodology that includes examining task assignments, container IDs, network settings, error messages, and runtime logs. By following this process, administrators can quickly identify configuration issues and restore service availability. These troubleshooting skills are critical for maintaining production container environments and ensuring reliable application delivery.
Lesson 05: Networking in Docker
Creating a Docker Bridge Network
This lesson introduces the Docker bridge network, the default networking driver used to enable communication between containers on a host. Learners create a custom bridge network using docker network create and then verify its existence with docker network ls. The exercise highlights how Docker automatically configures bridge networking and assigns it a local scope, making it suitable for container-to-container communication.
The lesson then explores network inspection using docker network inspect, allowing administrators to view important details such as the network driver, subnet, gateway, and IPAM configuration. Understanding bridge networks is essential because they form the foundation of Docker networking and provide isolated communication channels between containers while maintaining connectivity to the host environment.
Creating User-Defined Bridge Network
This lesson expands on Docker networking by demonstrating how to create and manage user-defined bridge networks. Students create a custom network, attach a container to it during creation, and later connect a running container to the same network using Docker network management commands. The exercise illustrates how user-defined networks provide greater flexibility and control than the default bridge network.
A major benefit of user-defined bridge networks is improved isolation and simplified service discovery between containers. By inspecting container network configurations and testing network attachment and removal, learners gain practical experience managing container communication paths. These skills are valuable when designing secure, scalable containerized applications that require custom network segmentation.
Creating a Host Network
This lesson demonstrates the host networking driver, which allows a container to share the host machine’s network stack directly. Instead of using network address translation (NAT) or virtual interfaces, the container binds directly to the host’s network interfaces. Learners deploy an Nginx container using the –network host option and verify access through the host’s localhost interface.
The lesson highlights the performance benefits and simplicity of host networking, particularly for applications that require low latency or direct access to host network resources. Through container inspection, port verification using netstat, and interface examination with ip addr show, students observe how host networking differs from traditional bridge-based networking. The exercise also reinforces important limitations, such as host networking being supported only on Linux systems.
Publishing Swarm Service Ports
This lesson focuses on exposing Docker Swarm services to external clients through published ports. Learners initialize a swarm cluster and create an Nginx service with multiple replicas, publishing port 8080 using Docker’s Routing Mesh. This enables incoming requests to be automatically distributed across service replicas regardless of which node receives the traffic.
The lesson also introduces host-mode publishing, where service ports are bound directly to the swarm node rather than routed through the mesh. By comparing Routing Mesh and host-mode publishing, students gain a deeper understanding of Docker Swarm networking options and how they affect application accessibility, load balancing, and deployment architecture.
Configuring Docker to Use External DNS
This lesson teaches how to configure Docker to use external DNS servers for container name resolution. Learners modify the Docker daemon configuration file (daemon.json) to specify Google DNS servers and then restart the Docker service to apply the changes. This configuration ensures that containers can reliably resolve external hostnames using defined DNS infrastructure.
The lesson also demonstrates DNS testing using the Netshoot troubleshooting container. Students validate DNS functionality with nslookup commands and learn how to override DNS settings on a per-container basis using the –dns flag. These techniques are particularly useful in enterprise environments where custom DNS servers, split-horizon DNS, or specific name resolution requirements must be enforced across containerized workloads.
Troubleshooting Container and Engine Logs
This lesson introduces a structured troubleshooting workflow for diagnosing Docker networking and connectivity issues. Learners create multiple Ubuntu containers, inspect their configurations, review Docker daemon logs through journalctl, and analyze container networking details. The exercise demonstrates how container inspection and engine logging provide critical visibility into Docker operations.
The lesson concludes with connectivity testing between containers by identifying container IP addresses, entering a running container with docker exec, installing network utilities, and verifying communication using ping. These troubleshooting techniques help administrators isolate network issues, validate container communication, and quickly identify root causes of connectivity problems in Docker environments.
Lesson 06: Security in Docker
Building a Secure Docker Container
This lesson introduces one of the most important Docker security best practices: avoiding the use of the root account inside containers. Learners create a custom Dockerfile based on Ubuntu, add a dedicated non-root user named myuser, and configure the container to run under that account by default. Running applications as a non-root user significantly reduces the impact of potential compromises because attackers gain fewer privileges if a container is exploited.
The lesson then demonstrates building and launching the container image and validating that the application is running as the newly created user. By inspecting the /etc/passwd file inside the container, students confirm that the non-root account exists and is being used. This exercise provides a practical introduction to container hardening and establishes a foundation for implementing additional Docker security controls in production environments.
Checking Vulnerabilities Using Trivy
This lesson focuses on vulnerability assessment of container images using Trivy, one of the most widely adopted open-source container security scanners. Students install Trivy by adding the Aqua Security repository, importing trusted signing keys, and configuring the package source before installing the scanner. The setup process ensures access to the latest vulnerability databases and scanning capabilities.
After installation, learners scan an NGINX container image using the trivy image nginx command. The scan identifies vulnerabilities within operating system packages and application dependencies, categorizing findings by severity levels such as Low, Medium, High, and Critical. The results include package versions, CVE identifiers, remediation information, and reference links, helping administrators prioritize security updates and reduce risk in containerized environments.
Performing SAST for a Docker Image Using Snyk CLI
This lesson demonstrates how to perform Static Application Security Testing (SAST) against Docker images using the Snyk CLI. Students download and install the Snyk command-line tool, configure it within their operating system, and authenticate it using an API token obtained from their Snyk account. Once configured, the CLI provides an automated way to identify known vulnerabilities within container images before deployment.
The lesson culminates in scanning an Ubuntu Docker image with snyk container test ubuntu. The resulting report identifies vulnerable packages, explains the nature of the security risks, and provides remediation guidance. By integrating Snyk into container development workflows, organizations can shift security testing left, detect vulnerabilities earlier in the software lifecycle, and improve overall application security before containers reach production environments.
Performing DAST for a Docker Container Using OWASP ZAP
This lesson introduces Dynamic Application Security Testing (DAST) using the OWASP ZAP security scanner running inside a Docker container. Learners download the official ZAP image, create a dedicated workspace, and launch the scanner in an isolated Docker environment. Unlike static analysis tools, DAST evaluates a running application from an external perspective, simulating the techniques an attacker might use against a live system.
Students then execute a baseline scan against a target website and generate an HTML security report. The scan identifies potential vulnerabilities, insecure configurations, and web application security weaknesses while producing a report that can be reviewed outside the container. This lesson demonstrates how Docker can simplify the deployment of security testing tools and how DAST complements vulnerability scanning and SAST by evaluating the behavior of running applications rather than simply analyzing source code or image contents.
Lesson 07:Microservices Architecture in docker
Creating a Simple Microservices Architecture Design
This lesson introduces the foundational concepts of microservices by building a simple client-server application using Docker and Docker Compose. A lightweight Python HTTP server is created to serve static content, while a separate client application retrieves and displays that content. Each component is containerized using its own Dockerfile, demonstrating how independent services can be packaged and managed separately while still working together as part of a larger application.
The lesson culminates with the creation of a Docker Compose configuration that orchestrates both services, automating their deployment and communication. Through this hands-on exercise, learners gain practical experience with service isolation, container networking, dependency management, and multi-container application deployment. The project provides a strong introduction to microservices architecture and highlights how Docker Compose simplifies the management of interconnected services in development environments.
Configuring Docker Networking for a Microservices Environment
This lesson focuses on enabling communication between microservices through Docker networking. Using a simple HTTP server and client application, learners build two separate containers and configure them to communicate through Docker Compose. The exercise demonstrates how networking allows independently deployed services to exchange data while maintaining container isolation and portability.
Students also explore Docker networking concepts such as bridge networks, host networking, and container discovery. By inspecting Docker networks and observing service interactions, they gain a deeper understanding of how Docker manages communication paths between containers. These networking fundamentals are critical for designing scalable microservices architectures where services must reliably communicate across distributed environments.
Scaling Microservices with Docker Swarm
This lesson demonstrates how Docker Swarm can be used to scale microservices and provide high availability for containerized applications. Learners begin by initializing a Docker Swarm cluster and defining services within a Docker Compose file. Replica counts are assigned to services, allowing multiple instances of applications such as web servers and backend services to run simultaneously across the swarm environment.
The lesson then introduces Docker Stack deployments and service management commands. Students deploy their application stack, monitor running services, and dynamically scale services up or down as requirements change. By leveraging Swarm’s orchestration capabilities, organizations can improve application resilience, distribute workloads efficiently, and simplify management of large-scale microservices deployments while minimizing downtime during updates and maintenance.
Applying Health Checks and Monitoring to Microservices
This lesson emphasizes operational reliability by implementing health checks and monitoring within a microservices environment. Learners build two Flask-based microservices, each exposing a dedicated /health endpoint that can be queried to determine application availability. Docker Compose health check configurations automatically monitor service status and help identify unhealthy containers before they impact application functionality.
The lesson also introduces observability concepts by integrating metrics collection using Prometheus-compatible monitoring endpoints. Students learn how monitoring tools can gather performance data, track application health, and support proactive troubleshooting. By combining health checks with monitoring, organizations gain greater visibility into service behavior and can improve the reliability, maintainability, and operational effectiveness of their microservices platforms.
Securing Microservices Using Docker
This lesson focuses on implementing security best practices within containerized microservices environments. Learners create Flask-based services and utilize environment variables to manage sensitive information such as application secrets. By separating secrets from application code, the lesson demonstrates a more secure approach to configuration management and reduces the risk of exposing sensitive credentials within source repositories.
The lesson further strengthens container security by introducing Docker Compose security features such as secrets management, isolated networks, resource limits, restart policies, and the no-new-privileges security option. These controls help reduce attack surfaces, prevent privilege escalation, and improve application stability. By applying these security measures, students gain practical experience in designing and deploying microservices that are both scalable and secure within production-ready Docker environments.



Leave a Reply